Introduction
Beam elements can be very useful when modeling with Ansys Mechanical. Utilizing beams efficiently can save Ansys users a lot of time. Once a model with beam elements is solved, you can insert beam probes to display the force and moment reactions for the beams. In some models, one may have defined hundreds of beam elements (for example, to represent fasteners). In such cases it can be cumbersome to manually create a beam probe for each beam. Additionally, with so many manual operations there is always the chance of human error – one may miss some beams, while duplicating others.
Fortunately, there is a way to automate this process and potentially save you a lot of time and frustration, while minimizing your chances of making errors in post processing. In this article we will discuss how to automate the process of creating beam probes for all the beams within the model.
Using Ansys Automation
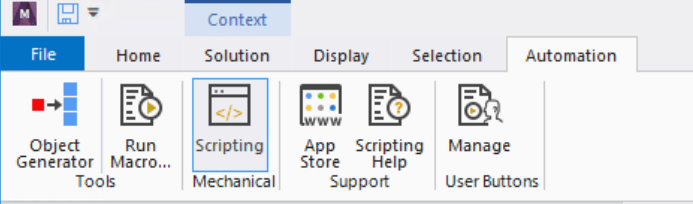
If you look at the ribbon in Ansys Mechanical, you will see an automation Tab as shown below:
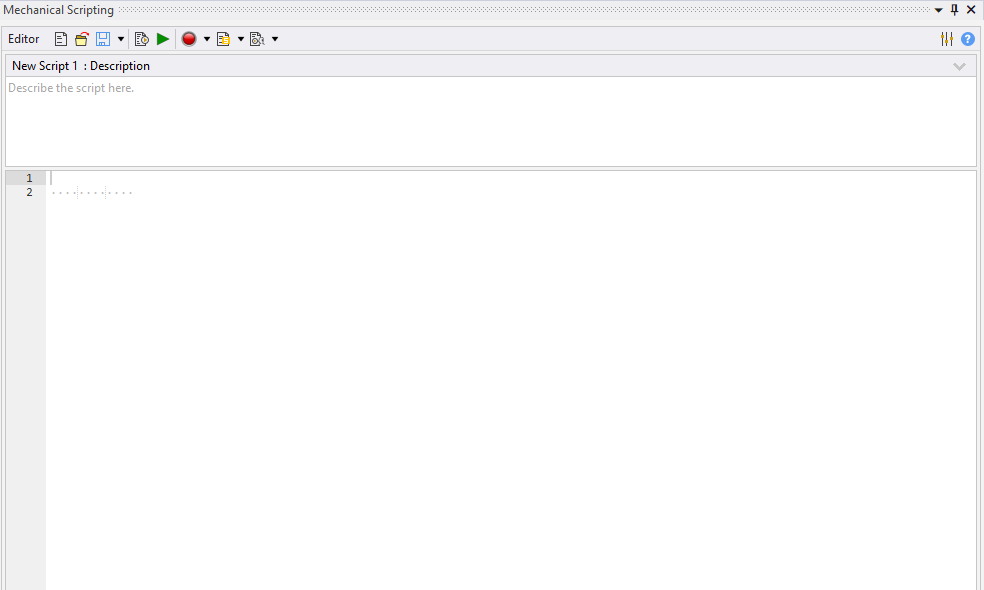
If you click on scripting, you will see a scripting editor. This editor can only interpret code written in Python. You can add python scripts here to enhance the capabilities of Ansys Mechanical. You can learn more about this editor here.
Script for Automatically Creating Beam Probes in Ansys Mechanical
The following is a Python Script that you can copy and insert as is in the scripting editor. I would like to thank Iteymar who posted this code on Github, and I accessed it from there.
"""
Add beam probes to the solution branch for all circular beam connections
========================================================================

"""

analysisNumbers = [2,3,4,5]       # List of analysis systems to apply this script

for a in analysisNumbers:
    analysis = Model.Analyses[a]
    analysis_settings = analysis.AnalysisSettings
    n = analysis_settings.NumberOfSteps             # number of time steps
    # List of display times for future use
    DISP_TIMES = [analysis_settings.GetStepEndTime(i) for i in range(1, n+1, 1)]

    # Get all cicular beam connection boundary conditions
    conns = Model.Connections.GetChildren(DataModelObjectCategory.Beam, True)

    # Create beam probes if beam connections exist
    if len(conns) > 0:
        # Beam connection names and IDs
        # connNames = [i.Name for i in conns]
        # connIDs = [i.ObjectId for i in conns]

        # Create Beam Probes for the end time
        probes = []
        with Transaction(True):     # Suppress GUI update until completion to speed the process
            for c in conns:

                # add a beam probe, scope to the beam connection and rename based on definition
                _ = analysis.Solution.AddBeamProbe()
                _.BoundaryConditionSelection = c
                probes.append(_)

        # Rename the probes by definition
        [p.RenameBasedOnDefinition() for p in probes]

        # Put all beam probes into a group folder
        group = Tree.Group(probes)
        group.Name = "Beam Probes"

        Tree.Activate([analysis.Solution])
    else:
        print('No beam connections exist so no beam probes created.')
Below is an image showing the code inserted into the script editor:

You can then hit the green debug button to execute the code – You should see beam probes being inserted within the project tree.
Creating a button for your script
It is a good idea in general to save your scripts in the form of buttons that appear. These buttons can be created by clicking on “Manage” as shown below.
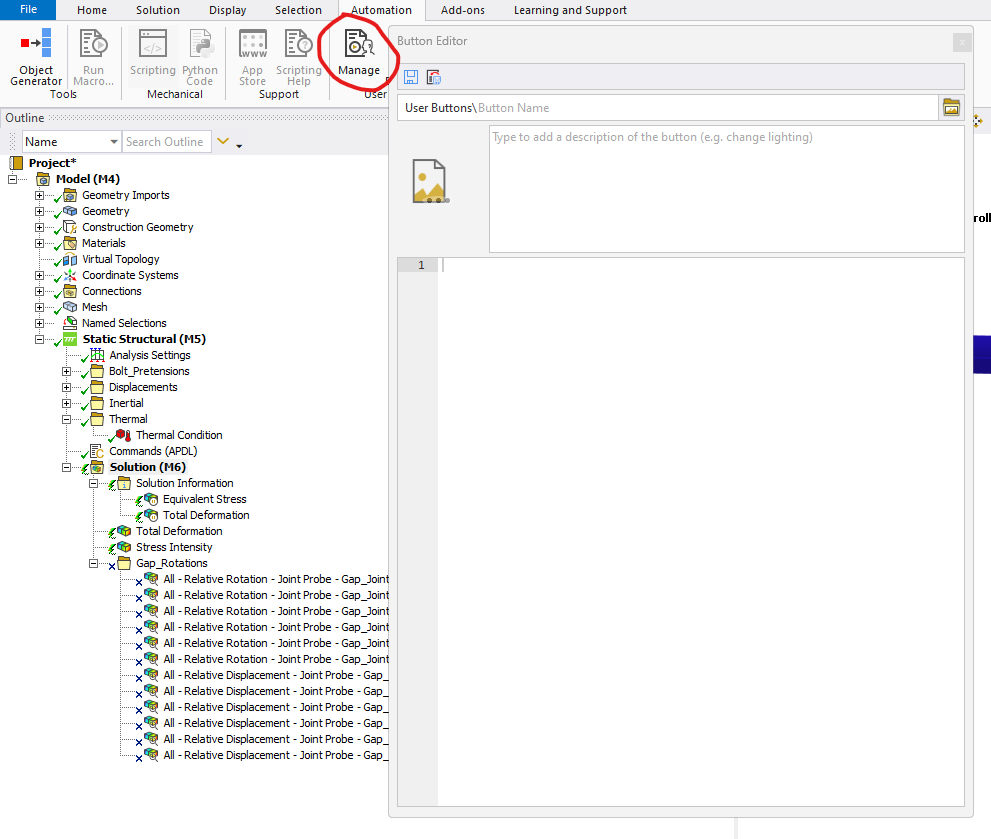
A button editor will open up where you can give the button a name, add a description and input the code. You can then save it. The button will now appear with the name that you gave it under “User buttons”.

Now, whenever you need to create probes for the beams within the model, you can just click the button.